Upload a selfie, headshot, or AI portrait. Reduce blemishes, redness, rough texture, under-eye darkness, and shine while keeping the same recognizable person.
Each pair starts from one image and changes one bounded skin issue. We chose the cases people actually bring to a skin enhancer: blemishes, under-eyes, mature dryness, mixed-light color, shaving irritation, and waxy AI texture.
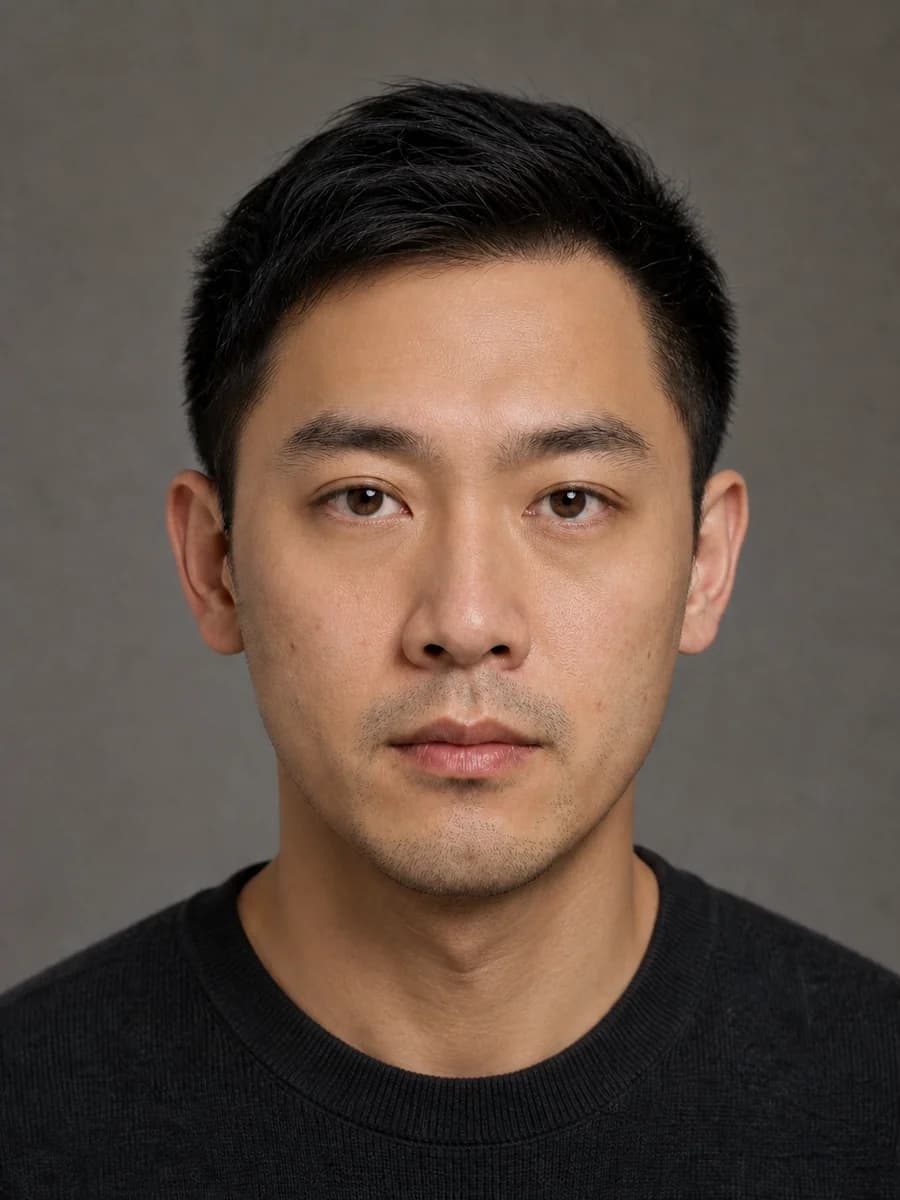
01
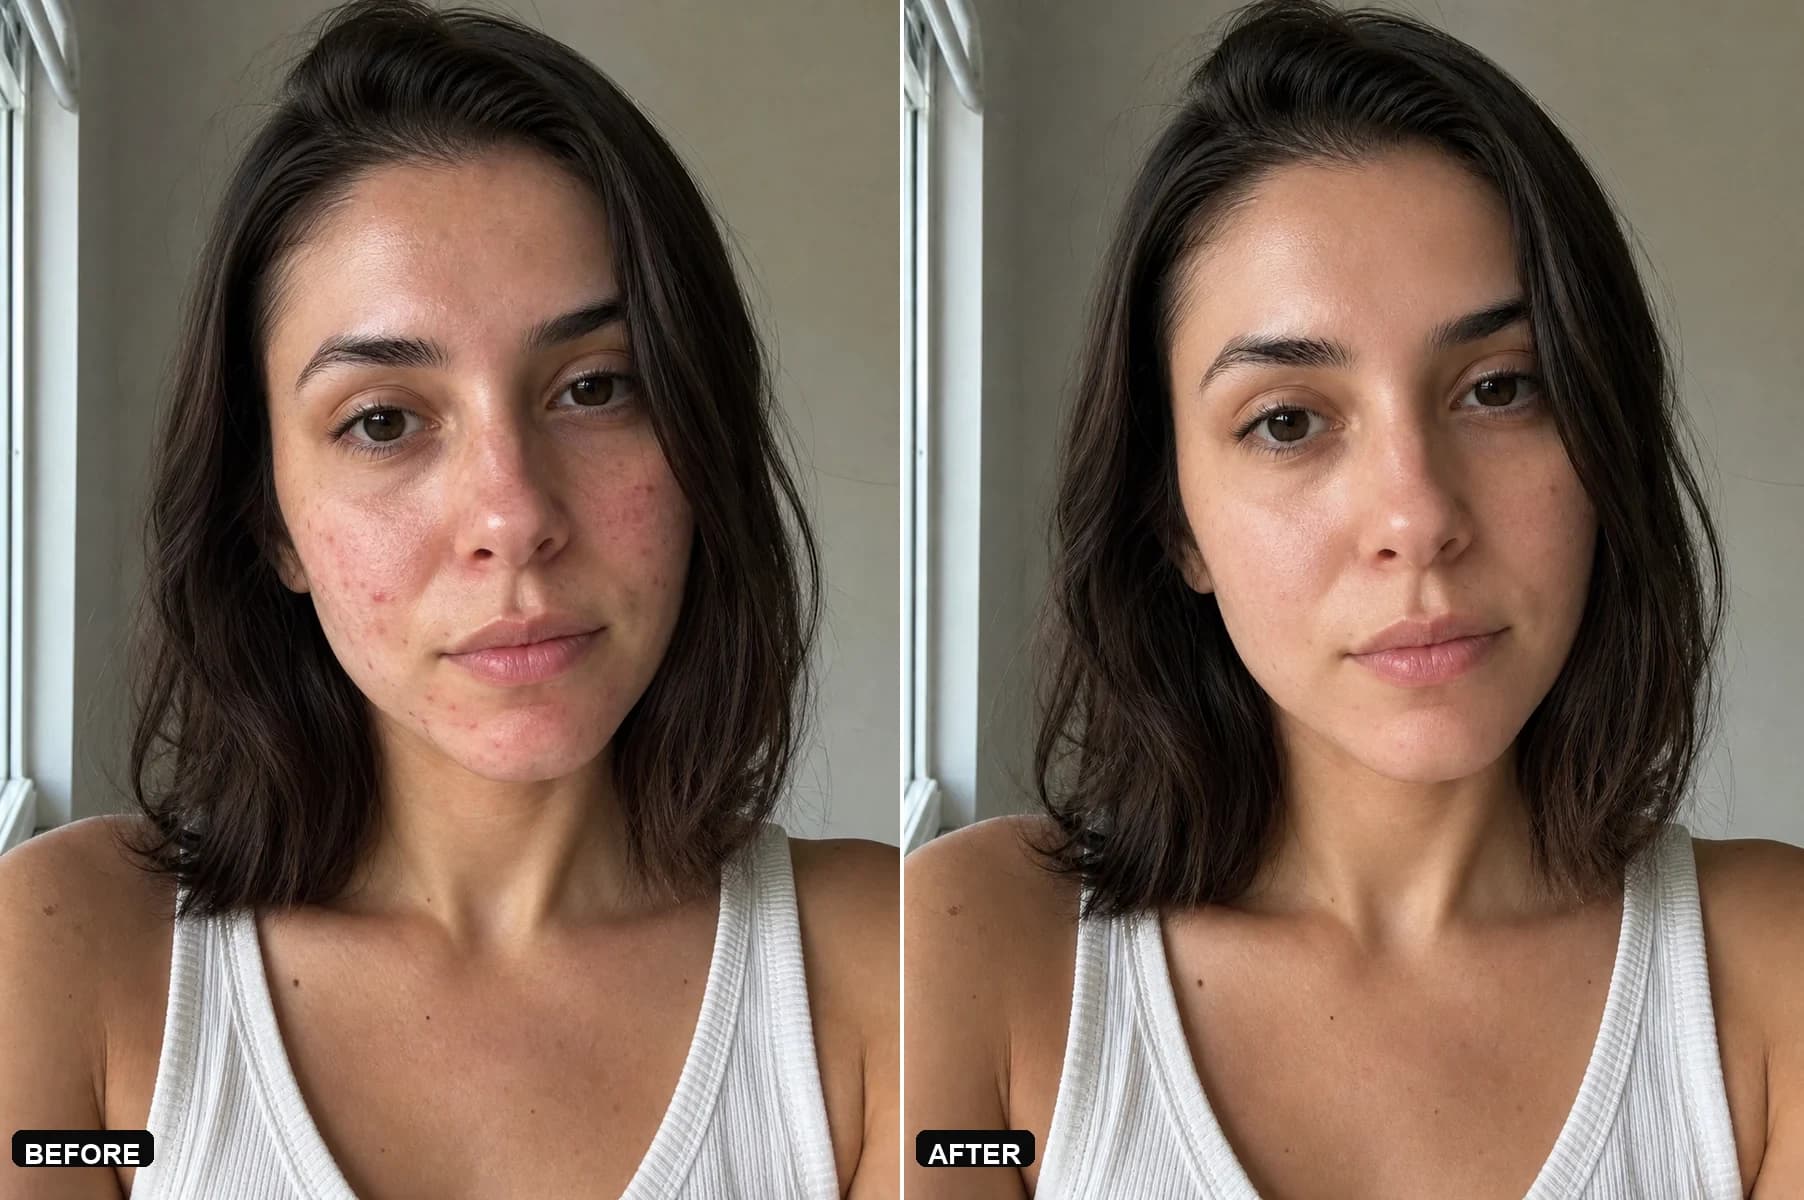
Selfie blemishes and redness
Clear temporary distractions without replacing the face
Before
After
What changedCheek and chin blemishes are visibly quieter, but freckles, pores, expression, window light, and face shape still match.
What we learnedName temporary blemishes and redness as the target. A generic “make skin perfect” prompt usually spends too much of the edit on smoothing.
02
Under-eyes and camera shine
Prepare a headshot without erasing character
Before
After
What changedUnder-eye darkness and the forehead hotspot are reduced. Eyelid shape, cheek volume, pores, stubble, and the neutral expression remain stable.
What we learnedAsk to balance color, not delete the under-eye area. Removing all shadow flattens the eye socket and can make the person look younger or simply different.
03
Mature skin with dry patches
Improve surface condition without age reversal
Before
After
What changedDry patches, localized redness, and one temporary blemish are reduced. Crow’s feet, smile lines, neck texture, and natural age remain visible.
What we learnedLock age cues before editing. Fine lines are structure, not noise; the useful target is distracting surface dryness and uneven color.
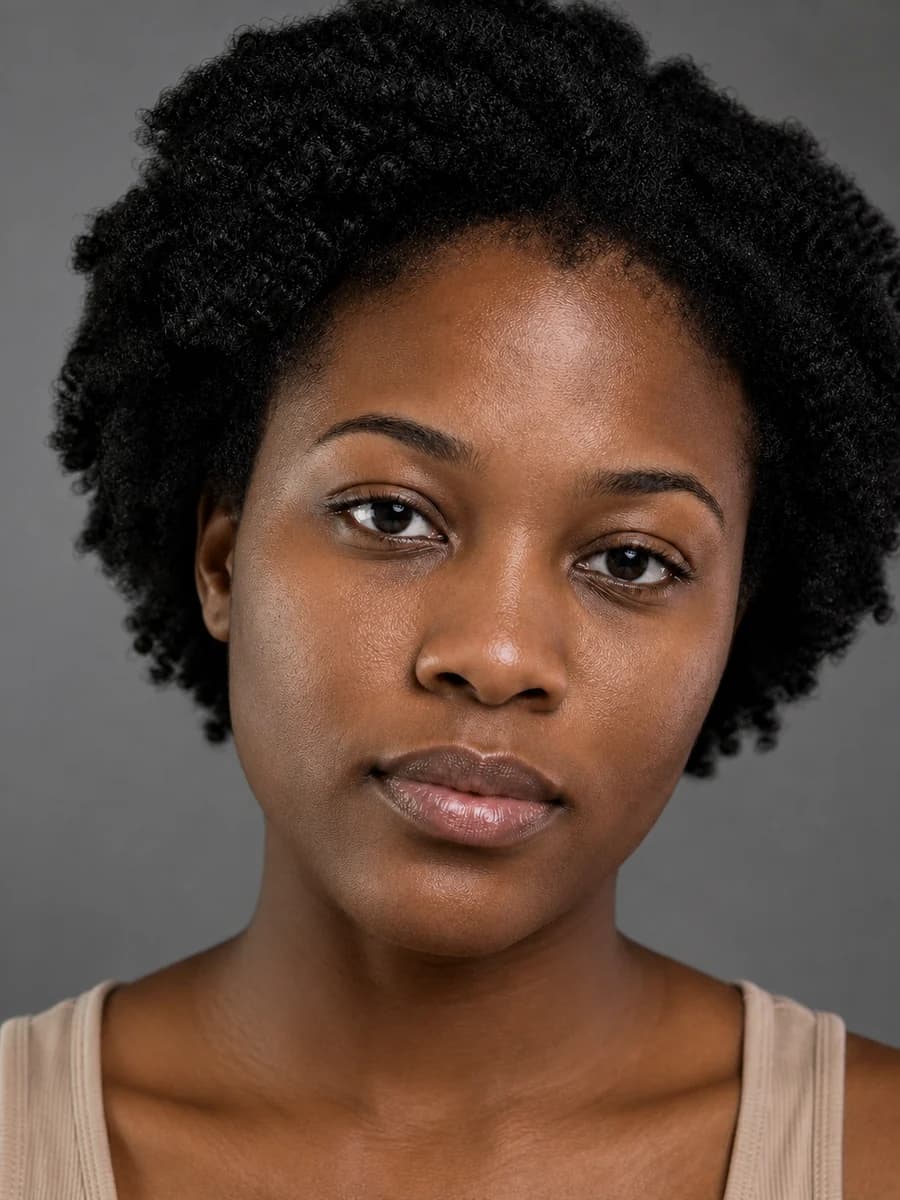
04
Deep skin tone under mixed light
Neutralize color cast without lightening complexion
Before
After
What changedThe green and magenta casts are neutralized and temporary cheek marks are softened. The deep complexion, highlight range, pores, and hair are preserved.
What we learnedColor correction needs a neutral-light reference plus an explicit no-lightening clause. “Brighten skin” is too ambiguous for accurate complexion work.
05
Shaving irritation and oily highlights
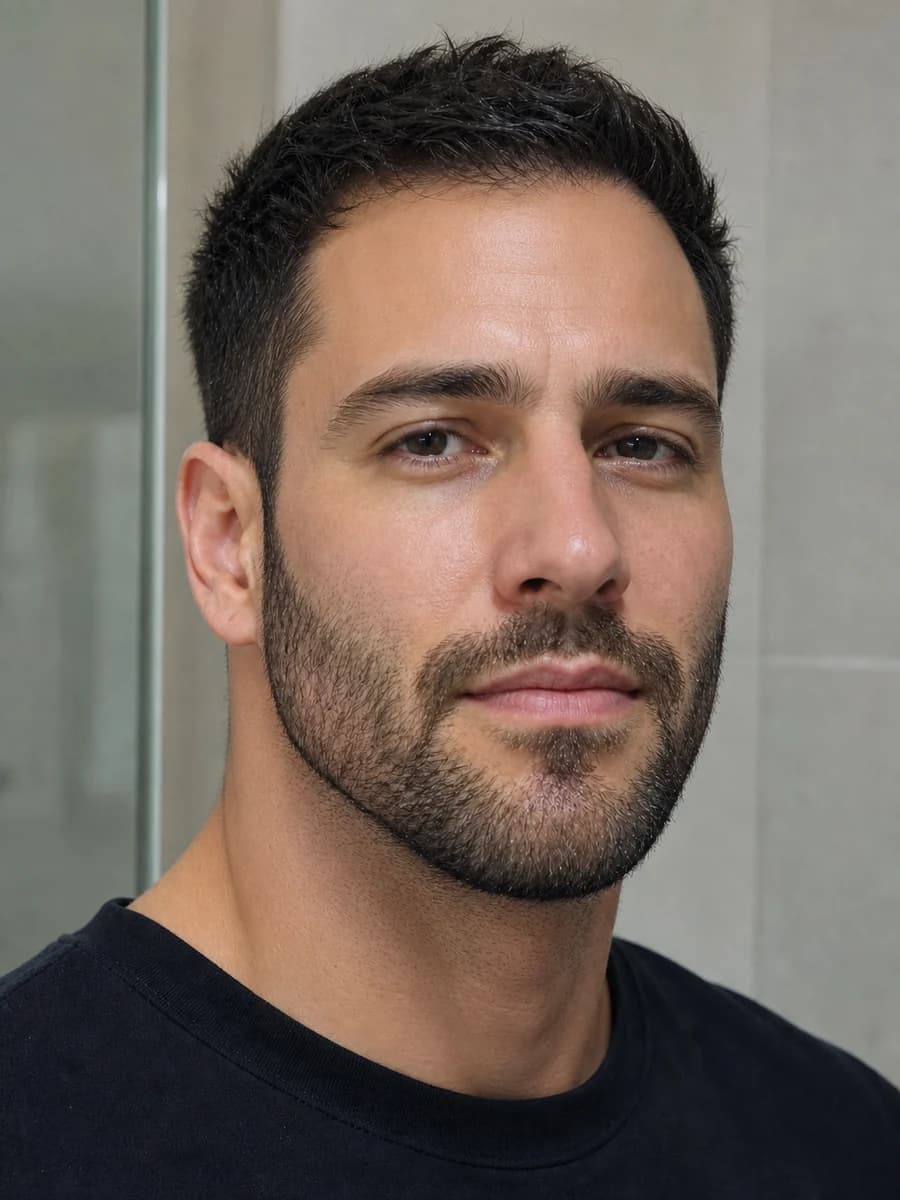
Clean the skin while preserving every beard edge
Before
After
What changedJaw and neck redness is visibly reduced and the bright forehead reflection is controlled. Individual stubble follicles and the beard line stay intact.
What we learnedFacial hair is the stress test. If the mask crosses the beard boundary, cleanup turns into patchy hair removal—inspect the jaw at full size.
06
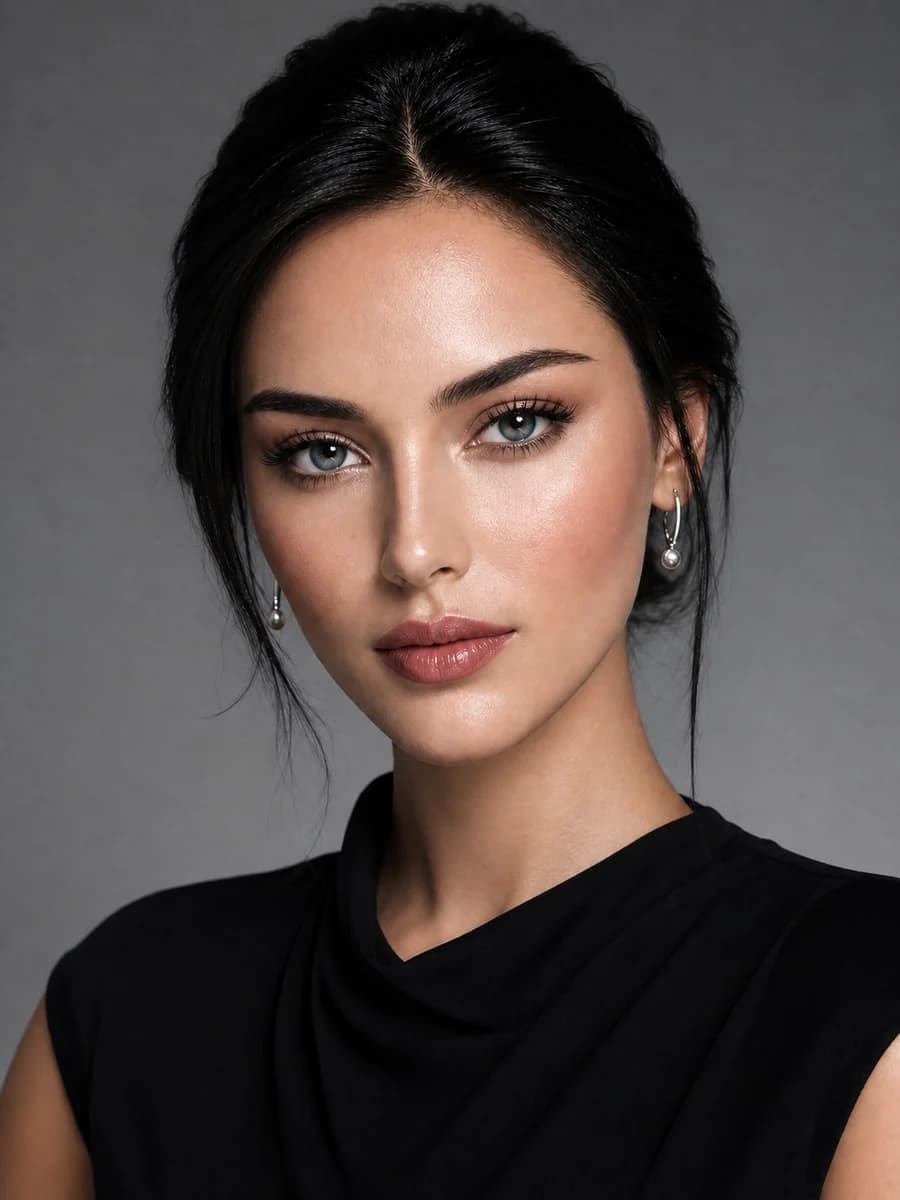
Waxy AI portrait texture
Add believable skin detail instead of a pore overlay
Before
After
What changedUniform plastic highlights become varied pores, fine facial hairs, and softer tonal transitions without changing makeup, anatomy, or styling.
What we learnedReal texture follows facial zones and light direction. A uniform pore pattern looks stamped on, especially across the nose, under-eyes, and forehead.
Our retouch contract
A precise brief prevents expensive reruns
In our six tests, the most reliable instruction had two halves: name the local correction, then lock every identity and context cue that must survive.
Target
DoName one visible issue
AvoidAvoid “perfect” or “flawless”
Identity
DoLock geometry and expression
AvoidReject eye, nose, lip, or jaw drift
Texture
DoKeep pores, lines, and fine hair
AvoidReject waxy blur or stamped pores
Context
DoKeep crop, light, hair, and scene
AvoidReject an unrequested restyle
Review at two sizes before download
At normal size: the improvement is easy to see.
At 100%: pores, lines, facial hair, and edge detail still vary.
The person is immediately recognizable in a blink comparison.
Complexion, lighting direction, crop, hair, and background match.
No retouched image is presented as medical or forensic truth.
AI Skin Enhancer FAQ
What does an AI skin enhancer do?
An AI skin enhancer makes a bounded portrait edit: reduce temporary distractions, correct uneven color cast, restore believable texture after an aggressive filter, or soften harsh lighting while preserving identity. It should not replace facial structure, change skin tone as a beauty ranking, or claim to reveal a person's true appearance.
Is the AI skin enhancer free?
Voor gives new accounts welcome credits and shows the estimated credit cost before the AI skin enhancer runs. There is no promise of unlimited free edits. Review the estimate, use one controlled instruction, and avoid spending credits on many near-identical variations.
Will the AI skin enhancer keep pores and texture?
It can when the prompt explicitly protects pores, fine lines, freckles, and normal tonal variation. Ask for local correction rather than smooth or perfect skin. Inspect cheeks, forehead, under-eyes, and jaw at full size because over-smoothing often appears there first.
Can an AI skin enhancer remove acne?
It can create a retouched interpretation that reduces temporary blemishes, but it is not a medical treatment or diagnosis. Preserve permanent marks unless the person asks otherwise, keep natural texture, and label heavy commercial retouching when disclosure is relevant.
Does the AI skin enhancer change skin color?
It should correct lighting or camera color casts, not rank or replace ethnicity-related features. State the neutral reference you want—such as balanced white light—and preserve the person's natural complexion. For creative recoloring, use the dedicated color changer with explicit consent.
Can I use the AI skin enhancer on client portraits?
Yes, with permission and a clear retouching brief. Agree on what may change, what must remain, and how the image will be used. Store and share the source carefully because a clear portrait contains biometric information.
How do I avoid a plastic AI skin enhancer result?
Use low-intensity language, protect pores and fine lines, and ask for one local change per pass. Compare the result at 100 percent zoom and at normal viewing size. If highlights look waxy or facial planes flatten, reduce the edit rather than adding artificial texture afterward.
Can the AI skin enhancer fix beauty-filter damage?
It can produce a plausible neutral reinterpretation when a filter has blurred texture or shifted color, but it cannot recover pixels that were deleted. Describe the result as an AI interpretation, not the original face restored with forensic certainty.
What images work best with the AI skin enhancer?
Use a sharp, evenly exposed portrait without heavy compression. Keep the face large enough to inspect and avoid mixed colored lights when accurate tone matters. A clean source lets the AI skin enhancer make a smaller, safer edit.
AI skin enhancer edits should disappear into the portrait
Make one controlled correction, compare at full size, and keep every identity cue you did not explicitly choose to change.
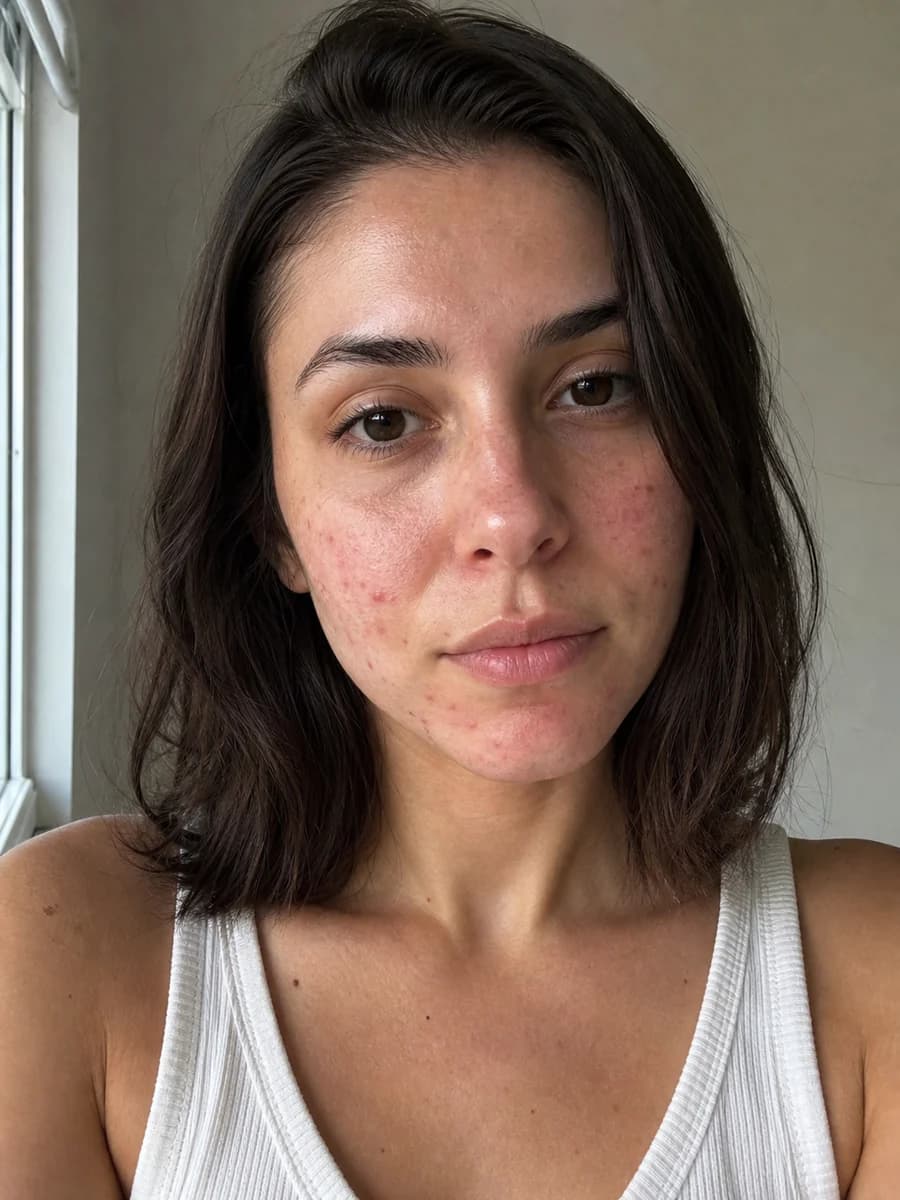 Before
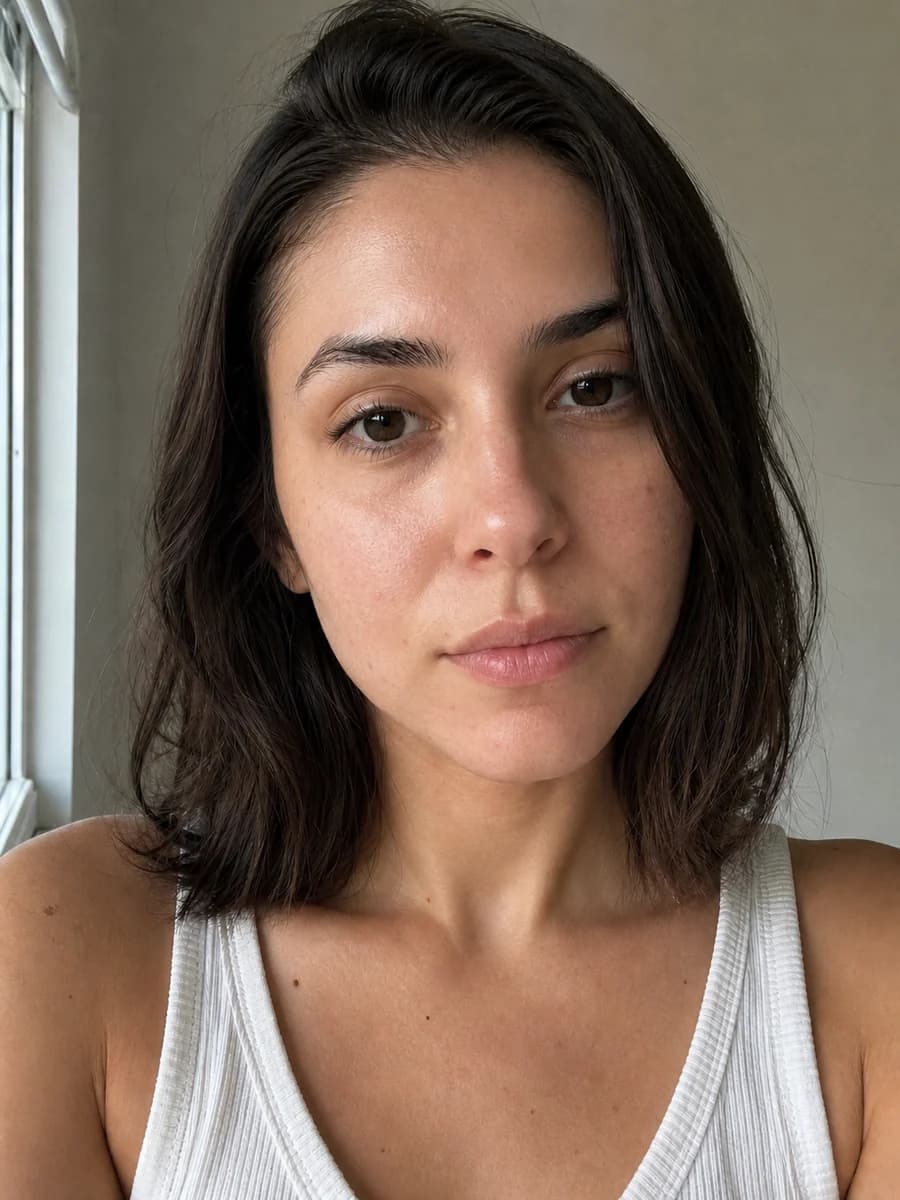 After
After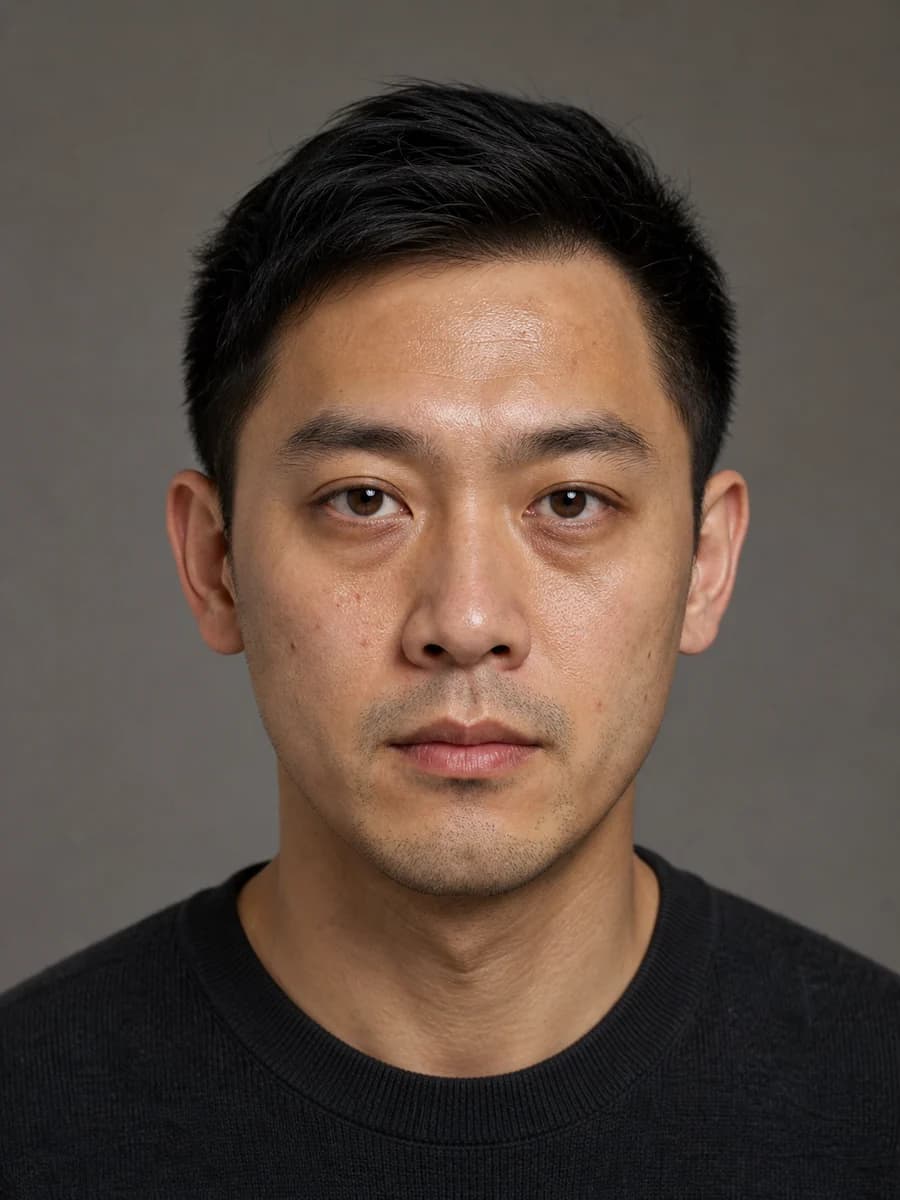 Before
 After
After Before
 After
After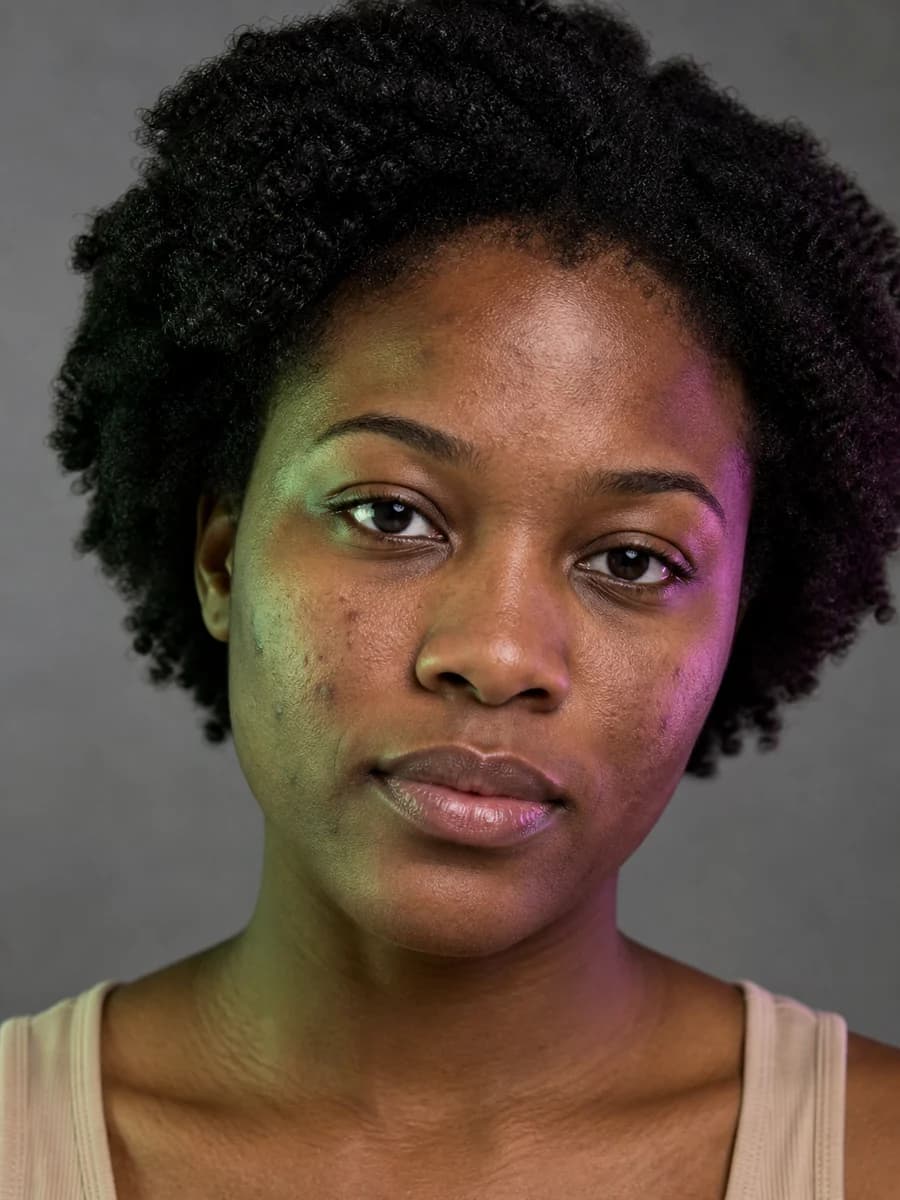 Before
 After
After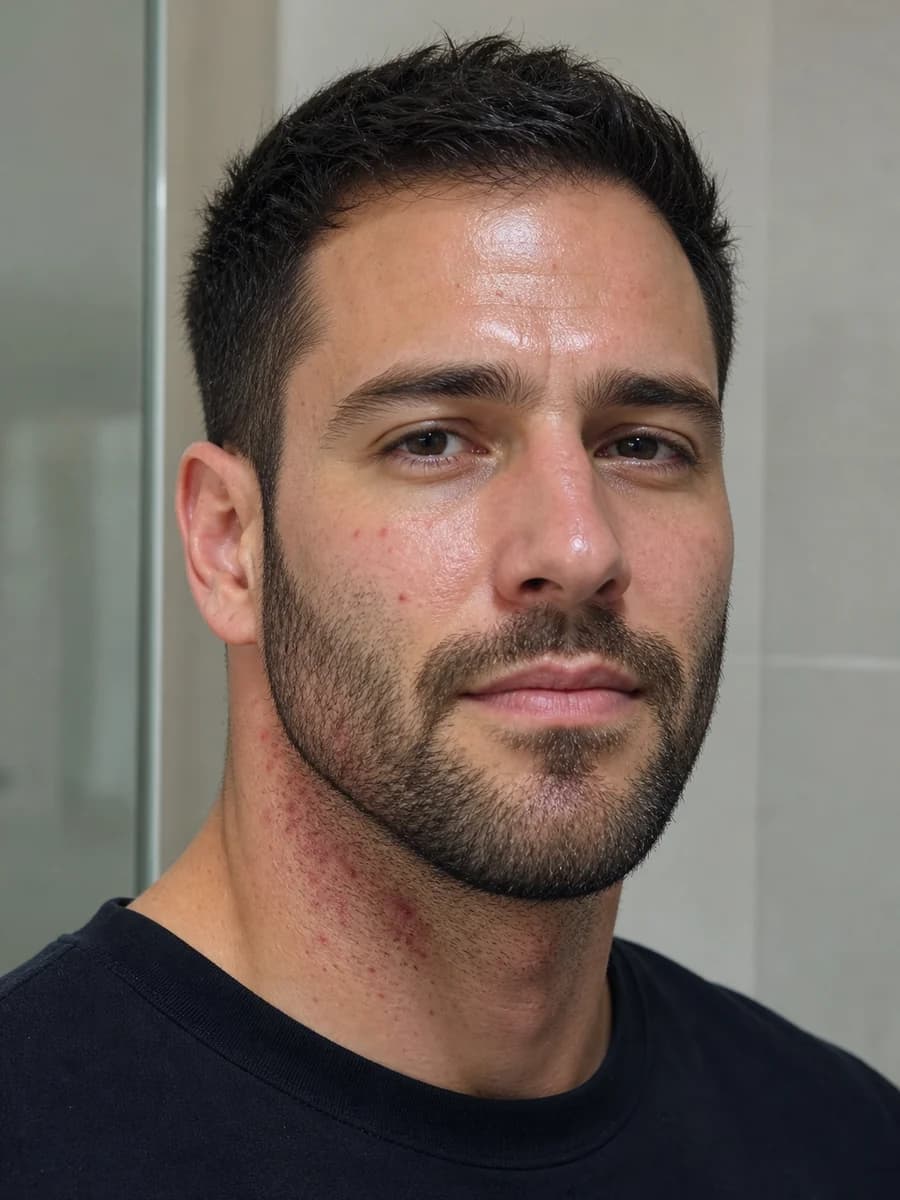 Before
 After
After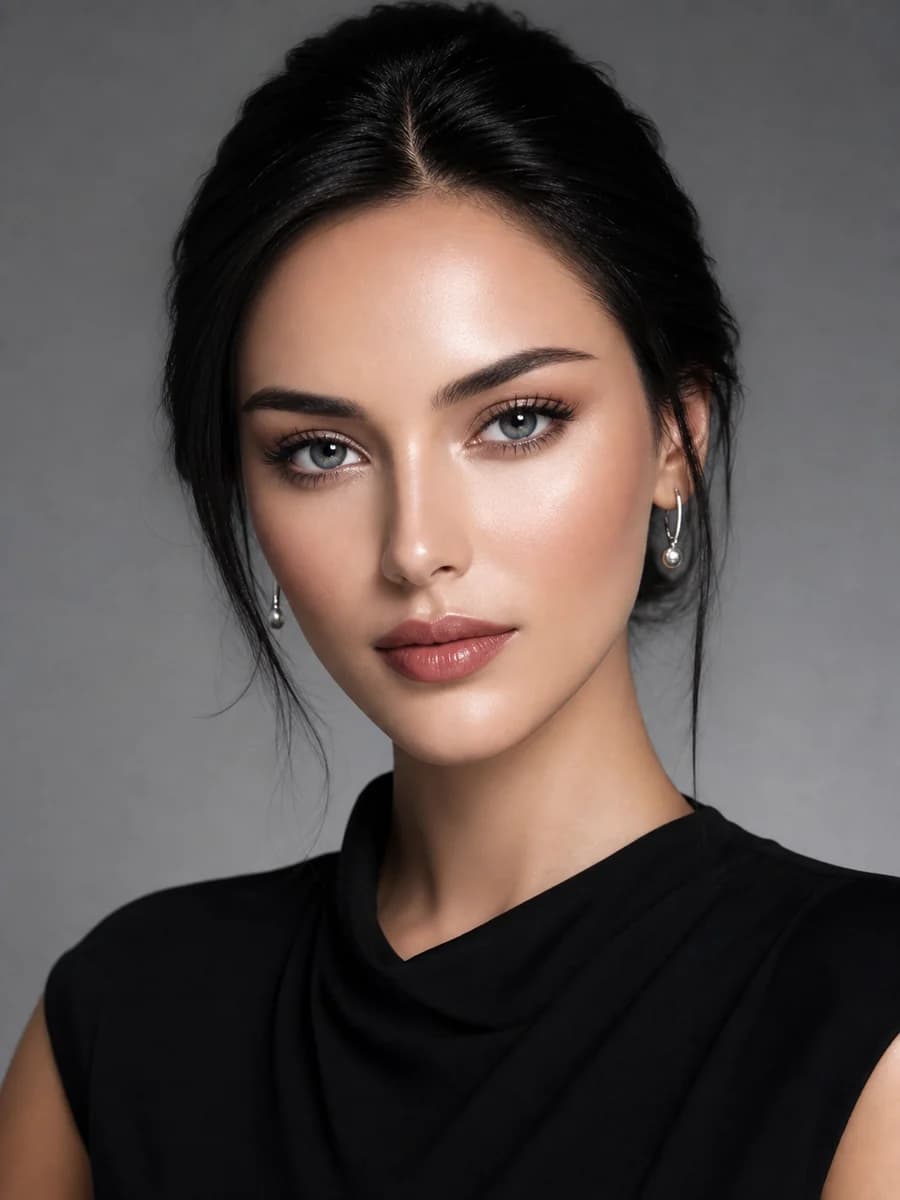 Before
 After
After